Cloning is a ubiquitous multi-step technique in molecular biology labs. We have previously discussed restriction digestion and ligation, so it’s time to conclude with transformation and colony screening.
You have successfully inserted your favorite gene into the cloning vector, and you are ready to make copies of the hybrid plasmid. This is achieved by introducing the plasmid into E. coli cells—a process known as “transformation,” indicating that the bacterial cells have been genetically modified (i.e. “transformed” by the uptake of the foreign DNA). For efficient transformation, cells need to be competent (i.e. altered in a way that allows for passage of foreign DNA through their cell walls). No matter how much DNA is added, only a certain number of cells will incorporate and duplicate the foreign DNA. This is referred to as the transformation efficiency, and is measured in Colony Forming Units (cfu) per µg of input DNA.
There are two methods to transform competent cells with plasmid DNA: chemical transformation and electroporation. Chemical transformation is more convenient and less expensive, and provides transformation efficiencies that are adequate for routine tasks. On the other hand, electroporation is quicker and more efficient, but requires specialized equipment (cuvettes and electroporator). It is the best choice for applications such as construction of libraries that require the best possible transformation efficiencies.
How does transformation work?
Chemically competent cells are treated with a buffer that contains CaCl2 and other salts—a process that is thought to create pores in the bacterial membrane, as well as mask the DNA’s negative charge and promote its binding to the cell membrane. In addition, heat shocking the cells at 42°C creates a temperature gradient between the inside of the cell and its external environment, further assisting in sweeping the plasmids into the cells.
Electroporation involves the application of short direct current (DC) pulses to cells suspended in a non-ionic buffer and placed in an electroporation device. The pulse induces a transmembrane potential that results in the formation of transient pores through which small molecules such as DNA or RNA are introduced into the cells. The exact mechanism for this passage is not completely understood. After the current is switched off, the pores quickly close, and the DNA is contained inside the cells.
Factors affecting transformation
1. Temperature: Competent cells are extremely sensitive to temperature fluctuations, and should always be stored at -70°C, ideally in a spot that is not accessed very often. At the time of transformation, make sure you have everything ready before you take the cells out of the freezer, and proceed with the transformation immediately after the cells are thawed. Thaw the cells on ice (5-10 minutes). Do not warm the vial between your fingers, or worse, in a water bath. For electroporation, microcentrifuge tubes and cuvettes should be pre-chilled on ice.
2. Handling: Competent cells should be handled very gently. Do not vortex or pipette the cells up and down. After you add the plasmid DNA to the cells, mix by gently flicking the tube 2-3 times.
3. DNA purity: DNA should be free of phenol, alcohol, salt, detergent, or PEG—all of which can drastically inhibit transformation. With electroporation, excess salt in the DNA prep can also cause arcing, an electric discharge (you’ll hear a pop and see a spark). As mentioned in our previous post (ligation), it is necessary to remove PEG from ligation reactions and to heat-inactivate ligation reactions prior to electroporation. This can be achieved by using spin column purification or ethanol precipitation.
4. Amount of DNA: This can range between 10 pg and 100 ng DNA, or 1 µl of a ligation reaction. Keep in mind that more DNA does not necessarily equal more transformants.
5. Electroporation cuvettes: When transferring the cell-DNA mixture into the cuvette, avoid introducing air bubbles. Gently tap and dry the cuvette with a Kimwipe before placing it in the electroporator.
6. Recovery: Following heat shock or electroporation, recovery medium (typically SOC) is added to the cells, which are then incubated for one hour at 37°C to allow expression of the antibiotic resistance gene before plating on selection agar plates. It is essential that recovery medium is added to the cells immediately after electroporation. A mere one-minute delay can cause a significant reduction in efficiency. If you are using ampicillin (which only kills actively dividing cells) as your selection agent, and if you are not aiming for a high number of transformants, this recovery time can be shortened or skipped altogether. Side note on ampicillin use: I personally prefer carbenicillin—a semi-synthetic ampicillin analog. It is more stable than ampicillin, and can reduce the growth of satellite colonies.
7. Selection plates: Cold and dry selection plates lead to lower transformation efficiency. Pre-warm plates at 37°C for one hour.
Essential controls
I love controls, and so should you! Appropriate transformation controls include:
1. Positive control: Transform competent cells with a known amount of a standard supercoiled plasmid. Most competent cell kits include such plasmids—typically pUC19. This control provides a measure of the transformation efficiency and the adequacy of the transformation protocol. You should include this positive control every time you’re working with a new batch of competent cells and/or carrying out a new cloning experiment.
2. Negative control: This is a mock transformation. Carry out the transformation protocol with an aliquot of cells to which no DNA has been added. Following recovery, plate the entire aliquot on a selection plate. No colonies should grow on this plate. If they do, this most often indicates that the plates are defective.
3. Ligation controls: These controls were discussed in our previous post. They are essential controls that can quickly help you identify issues with your transformation protocol and/or your ligation reactions.
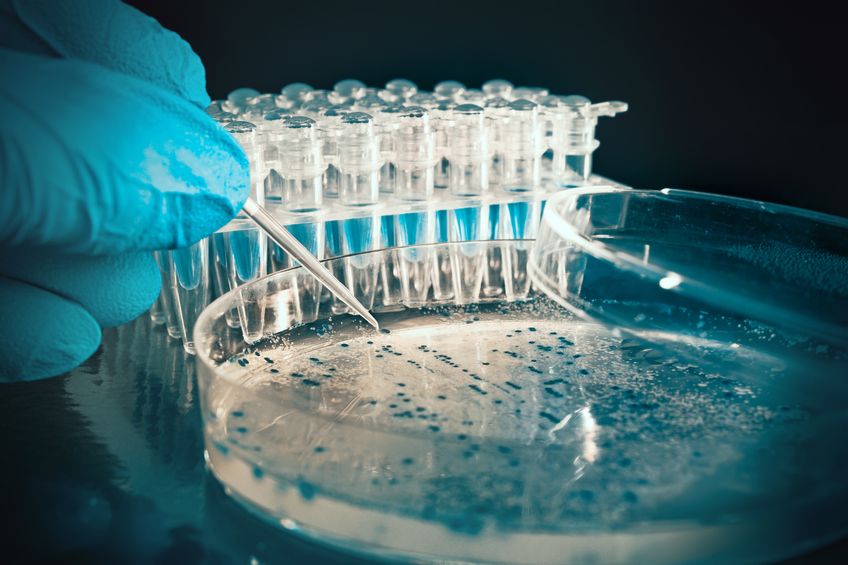
Colony screening
Your transformation plates yielded plenty of colonies with very low background. Great! But how can you be sure that your insert is actually present in these clones? If you are not using directional cloning (see restriction digestion post), how can you be sure that your gene was inserted in the right direction? Here are some methods for colony screening:
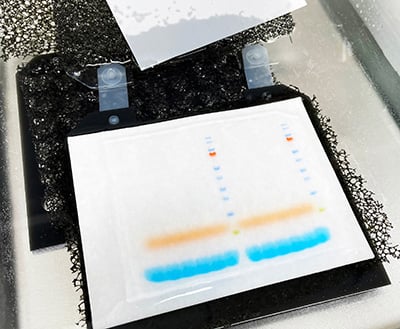
1. Colony PCR: Prepare your PCR master mix and aliquot into PCR tubes. Using a pipette tip or a sterile toothpick, pick individual colonies from the transformation plates, and transfer them to their respective PCR tubes. The initial denaturation step will lyse the cells and release the plasmid DNA, which becomes a template for the PCR. Insert-specific primers will confirm the presence as well as the size of the insert. To confirm the size and the orientation of the insert, you can pair an insert-specific primer with a vector-specific one. PCR products are then run on an agarose gel to confirm the presence or absence of the gene of interest. When using this method, make sure you don’t transfer agar into the reaction, as this can strongly inhibit the amplification reaction.
2. Restriction digestion: Pick individual colonies, grow them overnight in the appropriate selection broth, and isolate plasmid DNA using a miniprep kit. Digest 1 µg of this DNA with the appropriate restriction enzymes. If you have prepared your insert using restriction enzymes (see restriction digestion post), use these same enzymes. Run the digestion products on an agarose gel. You should see bands of the appropriate size corresponding to the vector backbone and the insert.
3. Sequencing: This is the gold standard for validation of recombinant plasmids. Use the miniprep DNA prepared above to sequence your clones. Make sure to use vector-specific primers that will span across the entire insert. Keep in mind that even the best sequencing reads will only generate about 750-800 bp of reliable data. Depending on the size of your insert, you may thus have to sequence in both directions, so that the ends of the sequences overlap, and you can obtain a complete read. You can also perform “primer walking,” where the sequence generated by the initial reaction is used to design a primer that will cover the rest of the insert.
I hope you’ve enjoyed this molecular cloning primer (pun intended), and that you’ve found some of these tips useful! Please feel free to comment or ask questions!
Quartzy is the world’s No. 1 lab management platform. We help scientists easily organize orders, manage inventory, and save money. We’re free and always will be. Visit Quartzy.com or reach out at info@quartzy.com.
Interested in writing for The Q? Send us an email!