Since the 19th century, the practice of tissue processing has remained largely unchanged, resulting in solidified, paraffin-embedded tissue blocks for sectioning. As staining procedures have advanced and immunohistochemistry is becoming more widely used, high-quality tissue sections are paramount for accurate interpretation of disease processes.
A Cornerstone to Quality Downstream Testing
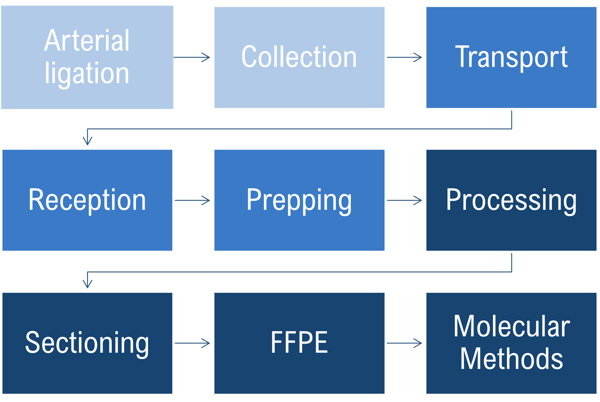
Below are some basic strategies to develop best laboratory practices and protocols from the beginning of the histology workflow, which results in good quality sections to minimize the need for repeat downstream testing.
Pre-Analytics & Fixation
As tissue samples are collected, ideally the time to fixation should be within a 20-minute window. The quicker the better, because stress responses are initiated almost immediately after the tissue is deprived of its blood supply. If you need to, keeping tissue near 4°C prior to fixation will slow down some of these processes induced by oxygen and nutrient deprivation.
Prior to fixation, tissue should be maintained in a neutral isotonic solution with physiologic calcium and magnesium concentrations to avoid any unnecessary disruptions of adhesion systems and activation of signaling cascades. An example of this is PBS (phosphate-buffered saline) with calcium and magnesium.
Besides time to fixation, the following factors in the pre-analytics stage can all impact tissue quality:
- Temperature of fixative
- Type of fixative
- Volume of fixative
- Total time in fixative
- Size of tissue sample
There are several types of fixatives on the market, including PFA (paraformaldehyde) and NBF (neutral buffered formalin).
For the volume of fixation needed, the general rule is 10-20x the size of your tissue. For many research studies a 4 oz., 8 oz., or 16 oz. container will be sufficient. When you are working with large organs you may need larger containers that so that the fixative (and subsequent reagents) can access both the exterior and interior of the organ.
Formalin is designed to penetrate rapidly and fix slowly. You’ll want to make sure to allow for adequate timing:
- Small biopsies: 12-18 hours fixation time
- Standard tissue sections (1.5 x 1.5 x 0.4 cm): 24-72 hours fixation time
Prosection
Before tissue can be processed, you should cut them into sections less than 5mm thick. A good rule of thumb is thinner than a nickel and the size of a postage stamp. This is because tissue cassettes are limited in size, usually to 3 x 2.5 cm. It’s a good practice to allow for 5mm space around all sides of the tissue sample.
Also, make sure to select the proper cassette for the application, considering various specs such as the pore size to ensure that the sample remains secure and intact.
By following prosection best practices, you can help reduce potential downstream artifacts:
|
Problem |
Resulting Artifact |
| Tissue too thick | Tissues may not fix or process completely or may be imprinted with cassette gridlines |
| Tissue touches cassette sides | Sectioned tissue will not fit on glass slide |
| Suture or staples present in tissue | Tears and holes during cutting |
| Brain or liver tissue placed in mesh or on sponges | Numerous holes formed in the tissue |
| Tissue fragment too small | Embedding and sectioning difficult. The tissue may become lost or destroyed during processing |
| Bone not properly decalcified | Very difficult to cut, and sections may shatter |
Processing
Tissue processing follows a basic three-step process:
1. The tissue sample moves through alcohol to remove free water
2. The tissue sample moves through xylene to remove the alcohol
3. The tissue sample is infiltrated paraffin wax, displacing the xylene
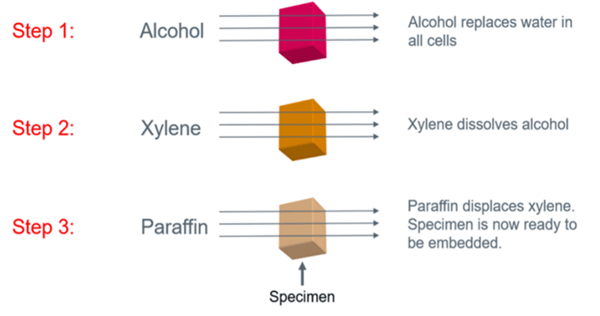
Source: Leica Biosystems, “Tissue Processing: A Cornerstone to Quality Downstream Testing"
There are various factors to consider throughout each step of this process. For example, in step one a traditional set up involves three graded alcohols (i.e. 70%, 80%, 95%) and three absolute alcohols (100%). During step two, you will also usually have three xylene stations. It’s a good idea to add some heat on the last xylene station before paraffin wax so that there is a smooth transition of one reagent to the next, as paraffin is solid at room temperature.
As you displace xylene with paraffin, make sure to pay attention to the temperature. In general, it’s a better to have tissue a little over-processed rather than under-processed for sectioning, particularly as we move toward more molecular testing. In addition, it is strongly recommended that you only use vacuum processing during the paraffin step, as opposed to a P/V (Pressure/Vacuum) push and pull method in a processor’s retort. It does a better job in removing xylene and preparing the tissue for embedding.
Embedding – Not a Slow Cooker!
When embedding tissue, it is critical to:
1. Complete this step within a reasonable amount of time (an hour or so)
2. Follow the temperature recommendations associated with your embedding medium.
Leaving tissue in the embedder for too long can lead to compromised quality, including degradation of nuclear markers and RNA.
Pair this with a good set of tools to work with your tissue sample and embedding medium. We recommend:
1. Metal or plastic molds – help enforce consistency
2. Curved forceps – allow you to press firmly on the tissue without leaving punctures or indentations)
3. Tampers – square pieces of metal with a handle that allows you to keep the tissue on an even plane
There are numerous techniques that you can use in tissue embedding. The image below illustrates some of the more common ones.

Image caption: Dey P. (2018) Embedding of Tissue in Histopathology. In: Basic and Advanced Laboratory Techniques in Histopathology and Cytology. Springer, Singapore. https://doi.org/10.1007/978-981-10-8252-8_3
Finally, a few embedding tips:
- Aim to keep a 3mm border of wax around the perimeter of the block – avoid tissue touching the edge, it will help with sectioning
- Avoid underfilling – if you can get to the top of the cassette it gives you more support
- Use your chilling plate – avoids solidifying at room temperature
Microtomy
In a histology workflow, you will generally be using some type of rotary or sliding microtome to create sections out of your embedded tissue sample. Make sure that both the chuck holder for the tissue block and your blades/blade holder are clean, tight, and lubricated for smooth operation.
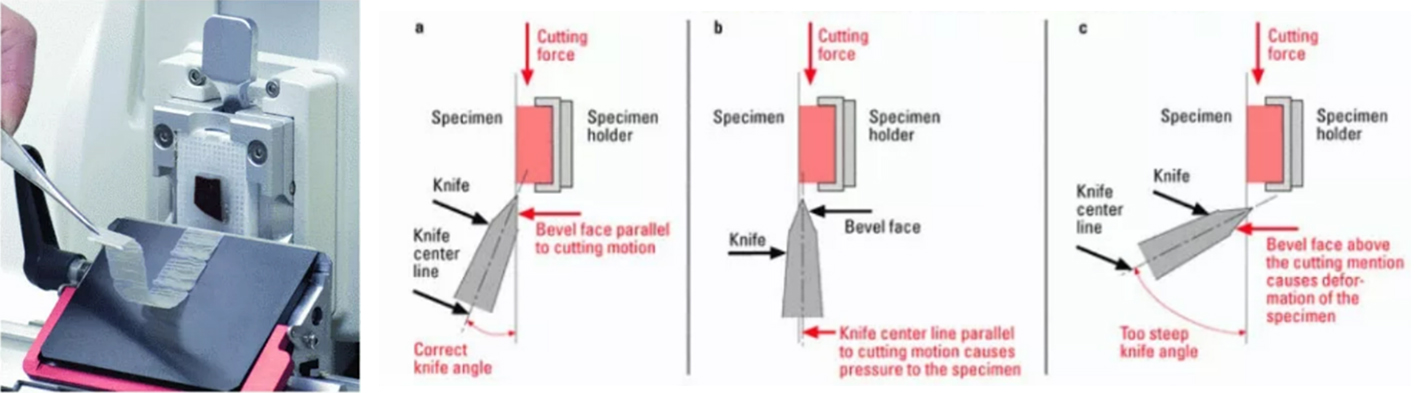
Based on the design of the blade assembly, microtomists will usually see an angle that needs to be set between 3-4 degrees. The right clearance angle is needed to properly section blocks. The wrong angle may lead to a variety of artifactual cutting and could be as extreme as the blade biting into the tissue and losing part of the sample.
In general, the correct knife angle can be achieved by:
1. Positioning the lower bevel face parallel to the specimen block and the plane of motion.
2. Raising the angle slightly (~1/2 degree if possible) above the bevel angle. The goal is to avoid having the lower bevel face slide over the specimen block and possibly produce friction damage.
*Leica Biosystems has a range of different blades for microtomy.
Summary
At each processing stage, many variables require consideration to eliminate artifacts and preserve tissue morphology to ensure high-quality sectioning.
- Pre-analytics – steps to ensure molecular integrity
- Fixation – steps to ensure morphological and biomarkers integrity
- Prosection – prepping and sampling for good processing
- Processing – reconsidering loading and leaving
- Embedding – tips to make sectioning easier
- Microtomy – techniques to ensure beautiful sections
The “tricks of the trade” or “histology hacks” shared above will help you to develop best laboratory practices and protocols from the beginning of the histology workflow, which results in good quality sections to minimize the need for repeat downstream testing.
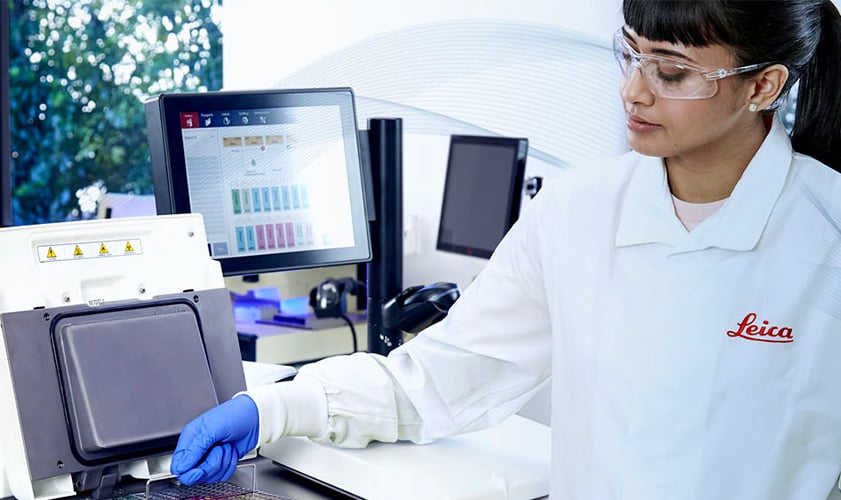
Leica Biosystems’ clinical and anatomical pathology leadership brings strong heritage, expertise, and innovation to Life Sciences. The Leica Biosystems comprehensive portfolio offers scientists confidence through reproducible results, bringing translational research from bench to bedside. See more of what we can offer on the Quartzy Marketplace.
This article is adapted from the Leica Biosystems hosted webinar below:
For Research Use Only. Not for use in diagnostic procedures.